In August 2010, back when my blog was on Blogger, a reader left a comment on one of my posts asking me to add email subscriptions. They didn’t visit regularly and wanted to know when I posted something new. Another reader agreed, so a few days later, I turned them on through FeedBurner.
FeedBurner handled them for over a decade, until Google ended its email feature in July 2021. That same month, I moved the blog to Hugo. The subscriptions didn’t make the move, and I never set them up again.
Five years later, email subscriptions are back. This time, I wanted more control, so I built them myself on Cloudflare and Resend, with help from Claude here and there. It all runs on free plans.
Just want it on your own blog? If your site uses Hugo with PaperMod on Cloudflare Pages, you can skip everything I went through. Jump to Making It Reusable for the ready-made versions.
Choosing an Email Service
Hugo builds a static site, which can’t send email on its own, so I needed a service for that part. I looked at Buttondown, Mailchimp, Mailjet and Resend. Buttondown is free for the first 100 subscribers, but emailing new posts from an RSS feed is an add-on that costs $9 a month. Mailchimp’s free plan now tops out at 250 contacts, and Mailjet’s limits sending to 200 emails a day.
I went with Resend. Its free plan allows 1,000 contacts with no limit on how many broadcasts I send to them, plus 100 other emails a day, which covers the confirmation and welcome emails. Its API is simple enough to call with plain fetch, without an SDK. These limits change, so check the current numbers before you decide.
How It Fits Together
There are two parts: PaperMod Subscribe handles signups, and Paperboy creates the new post emails, which Resend then sends to subscribers.
    flowchart TB
    reader("Reader") --> pms("<b>PaperMod Subscribe</b><br>(Cloudflare Pages)")
    pms -- "Confirmation email" --> confirms("Reader confirms")
    confirms -- "Added to list" --> list[("Subscriber list<br>(Resend)")]
    confirms -- "Welcome email" --> inbox("Reader's inbox")
    list -. "Recipients" .-> bc("Resend broadcast")
    feed("Blog RSS feed") -. "Checked periodically" .-> pb("<b>Paperboy</b><br>(Cloudflare Worker)")
    pb -- "Schedules broadcast" --> bc
    bc --> inboxes("Subscribers' inboxes")
How email subscriptions work, simplified
The two parts meet at the subscriber list in Resend. The subscription form adds new subscribers to it, and Paperboy’s broadcasts go out to everyone on it. The form runs on Cloudflare Pages, next to the blog itself, and Paperboy is a separate Cloudflare Worker. Each part has its own repo, which I’ll come back to at the end.
Sending From a Subdomain
The emails come from [email protected]. During testing, I sent from ayonkhan.ca itself, but Resend recommends a subdomain. Inboxes judge each domain that sends email, so a separate subdomain helps keep the blog’s reputation apart from my personal email on ayonkhan.ca. Big tech companies do the same on a larger scale, with separate subdomains for emails such as newsletters, orders and account updates.
Resend can receive email too, but I didn’t want another inbox to manage. So the subdomain has no mailbox. Instead, every email sets a Reply-To address, [email protected], and replies land in my main inbox.
To prove the domain is mine, Resend asked for three DNS records: a DKIM key, which lets inboxes check the emails really come from my domain, and two CNAMEs for bounces. Resend offered to add them to Cloudflare automatically, but I added them by hand, so I could see exactly what changed in my DNS. One thing to watch for in Cloudflare: new CNAMEs are proxied by default, and these need to be DNS only.
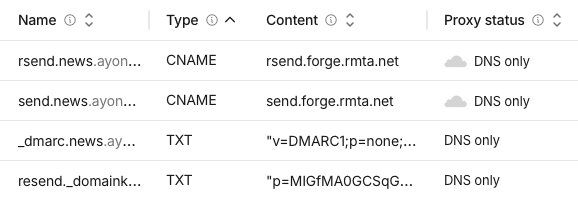
The subdomain’s records in Cloudflare DNS: three for Resend, plus a DMARC record I added later
Once the records were in, Resend verified the domain in about four minutes.

The domain’s timeline in Resend, from added to verified
Back in Resend, I also turned off click and open tracking for the domain. Click tracking rewrites every link to go through Resend first, and open tracking hides an invisible image in each email. Neither felt right for a personal blog.
The Subscription Form
The form sits at the end of every post, right above the comments. I can turn it off for the whole site in config.yml, or for a single post in its front matter.
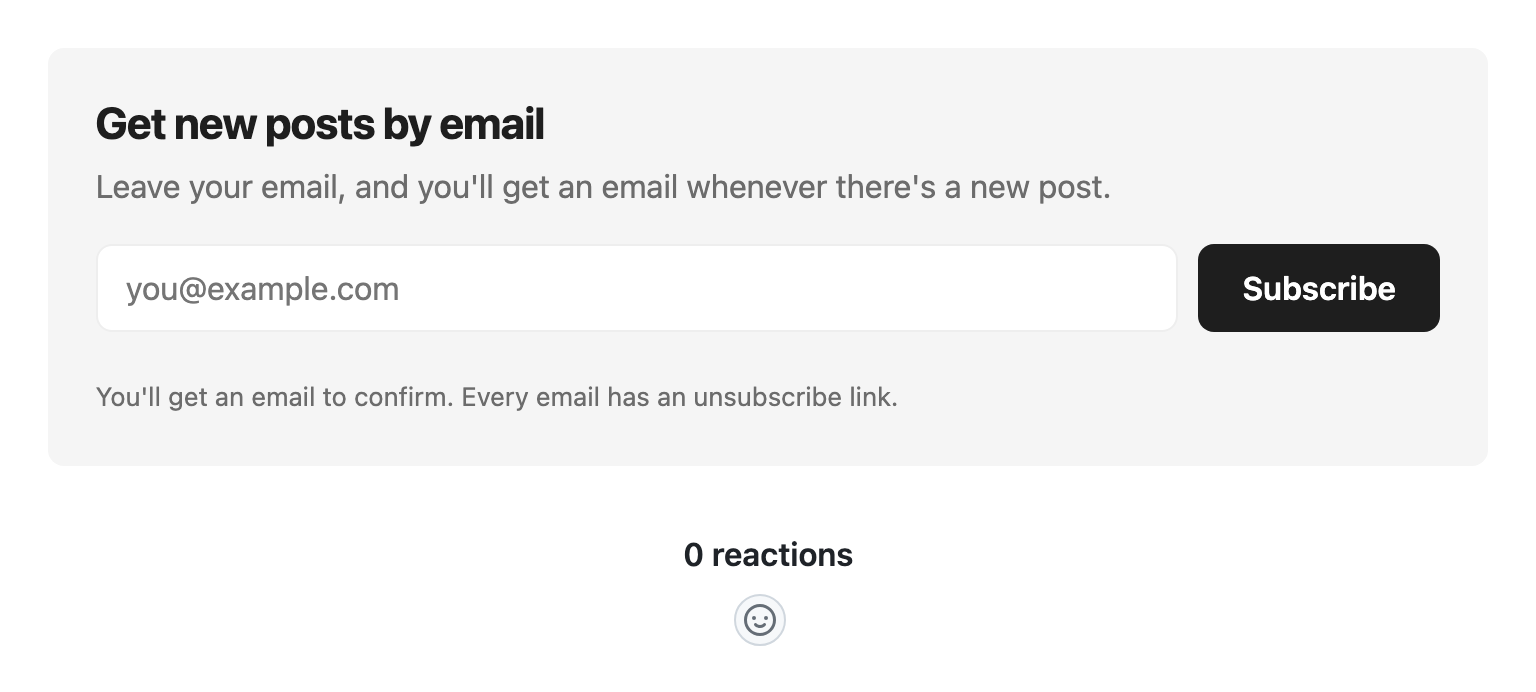
The form at the end of each post
I wanted three things from it.
It should look like it belongs. The form uses PaperMod’s own colour variables, so it follows light and dark mode without any JavaScript. PaperMod has no error colour, so the form sets its own red for each mode.
It should keep bots out without bothering people. The form uses Cloudflare Turnstile, set to only appear when it needs to:
<div class="cf-turnstile" data-sitekey="..." data-appearance="interaction-only"></div>
Almost everyone passes without seeing anything, and only a suspicious visitor gets a checkbox. When I tried it on a VPN, that’s exactly what I got:
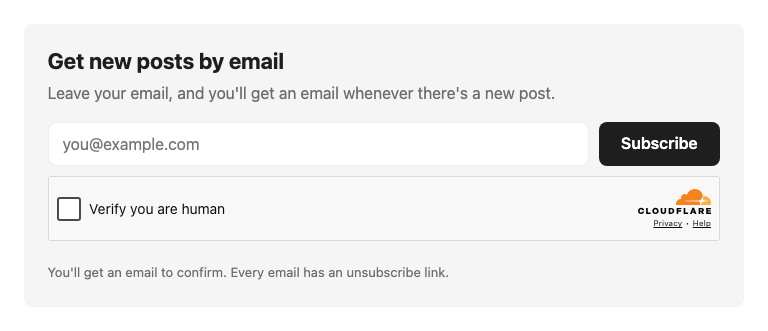
What Turnstile shows when it isn’t sure a visitor is human
When I run hugo server, the form swaps in Cloudflare’s test key, which always passes, so the real key never has to allow localhost.
It should never say who’s subscribed. Whether an address is new or already on the list, the form shows the same message: check your inbox. If it said “already subscribed”, anyone could type in an address and find out whether that person reads my blog.
When the address isn’t valid, the form says so in red and outlines the field:
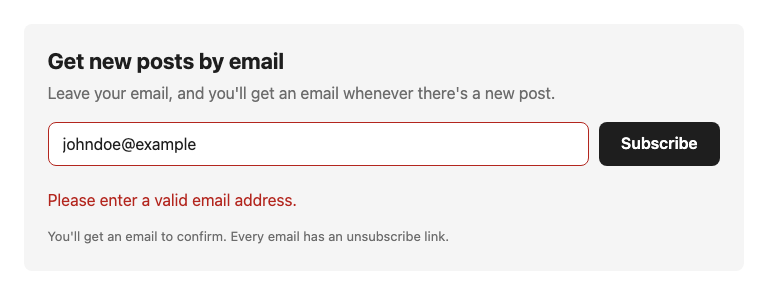
When the address isn’t valid
Confirming the Email Address
The form posts to a Cloudflare Pages Function. Any file under functions/ in a Pages project becomes an endpoint, so functions/api/subscribe.js answers at /api/subscribe. That keeps my Resend API key on the server, out of the browser.
The Function doesn’t add the address right away. It sends a confirmation email first, and the address only joins the list once the reader confirms. That way, nobody can sign up someone else.
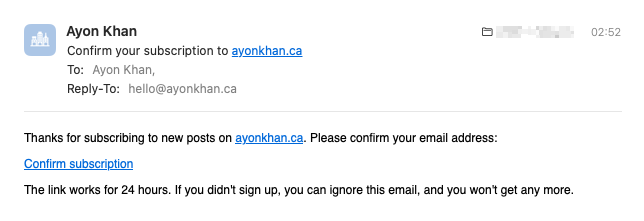
The confirmation email
I didn’t want a database just for pending signups, so the confirmation link carries everything it needs: the email address, an expiry time 24 hours out, and a signature. The signature is an HMAC, made from the address and the expiry with a secret key. The key is stored in Cloudflare and only used by the Functions on Cloudflare’s servers, so it never reaches the browser. Anyone can see the signature in their own link, but without the key, nobody can make a valid one for a different address or expiry time. So a link can’t be faked or extended.
The Link That Confirmed Itself
In my first version, opening the link was enough to confirm. Then I tested the email with mail-tester, and the test address showed up in my list as subscribed. Nobody had clicked anything. Mail-tester checks every link in an email for broken links, and visiting my confirmation link was all it took.
Mail-tester isn’t the only one doing this. Microsoft’s Safe Links and other email security tools can check links on their own, sometimes before the person even opens the email, and some of those checks visit the link. That means someone could enter another person’s address, and that person’s email security could confirm the subscription without them ever seeing the email.
The fix is a common one: the link opens a page with a Confirm button.
<form id="confirm-form" method="post">
    <button type="submit">Confirm subscription</button>
</form>
Most scanners visit pages, but they don’t press buttons. Only the button’s POST adds the contact. A plain visit to the link just shows the page. If a scanner ever did press it, the reader would still get the welcome email that follows, telling them they’re subscribed, with a link to leave.
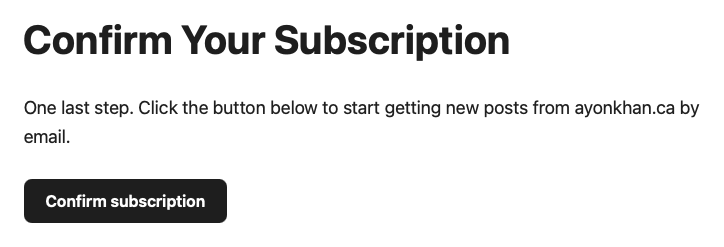
One last step
Pressing the button adds the reader to the list and brings them here:
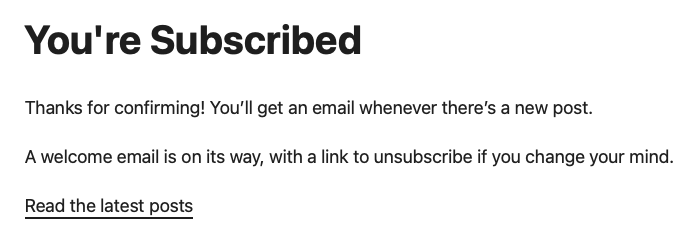
All done
Leaving Before the First Email
At first, the only way to unsubscribe was the link in a new post email, which Resend adds to every broadcast. Someone who changed their mind right after confirming had to wait for my next post to leave. Now, confirming also sends a short welcome email with its own unsubscribe link. Like the confirmation link, it opens a page with a button, so simply visiting the link won’t unsubscribe anyone. The email also includes a List-Unsubscribe header, which lets mail apps show their own Unsubscribe button. Apple Mail shows it at the top:
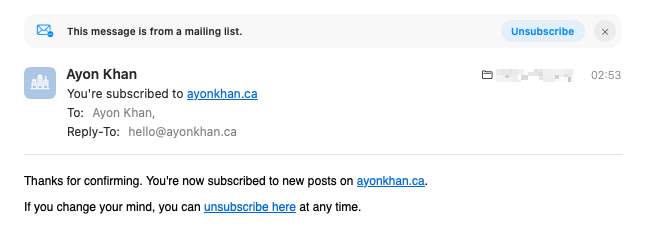
The welcome email in Apple Mail
All of these pages are regular Hugo pages, kept out of the RSS feed with build: list: never. That matters, because Paperboy treats the newest item in the feed as a new post.
Everything so far, the form, the Functions and these pages, is what became PaperMod Subscribe.
Emailing New Posts
This part is Paperboy, a separate Cloudflare Worker. Once an hour, it reads my blog’s RSS feed and checks whether the newest post is one it hasn’t seen yet. It remembers the last one in Cloudflare KV.
I could have done this in my GitLab pipeline, on every push. The problem is that pushing isn’t publishing. Hugo leaves out posts with a future date when it builds the site, so a pipeline could email a link that doesn’t work yet. The RSS feed only includes posts that are live on the site, so Paperboy never schedules an email for a post readers can’t see yet.
When it finds a new post, the Worker creates a broadcast in Resend, scheduled for later:
subject: 'New post: ' + post.title,
html: fill(template, post),
send: true,
// Gives you time to check the email and cancel it in Resend
scheduled_at: sendTime(env)
By default, sendTime schedules it two hours later. Those two hours are my safety net: if a title has a typo or the email looks wrong, I can cancel it before anyone gets it. The delay is a setting, so anyone using the Worker can make it longer, shorter, or send right away. On its very first run, the Worker only records the newest post, so turning it on doesn’t email an old post to everyone.
The Worker has no public URL at all, since it only ever runs on its schedule. I connected its GitHub repo in Cloudflare, so every push deploys it, just like the blog.
The Email Template
The confirmation and welcome emails from PaperMod Subscribe are short, plain messages written right in its Functions, so they don’t need a template. The new post email from Paperboy does.
Writing HTML for email is painful, because every email app renders it differently. I wrote Paperboy’s template in MJML instead, which compiles simple tags into HTML that works across most email apps, including Gmail, Outlook and Apple Mail. It’s compiled once, when Paperboy deploys. Compiling it on every run would have been too slow for the free plan’s 10 ms CPU limit.
The template has two kinds of placeholders. Paperboy fills in its own, like the post title, before creating the broadcast. Resend fills in its own when it sends, like the unsubscribe link, {{{RESEND_UNSUBSCRIBE_URL}}}. If mine used curly braces too, Paperboy could mistake Resend’s placeholder for one of its own and blank it out, before Resend ever got to fill in the unsubscribe link. So mine use percent signs instead:
<mj-text font-size="22px" font-weight="700">%%title%%</mj-text>
<mj-text color="#4a4a4a">%%description%%</mj-text>
<mj-button href="%%link%%">Read the post</mj-button>
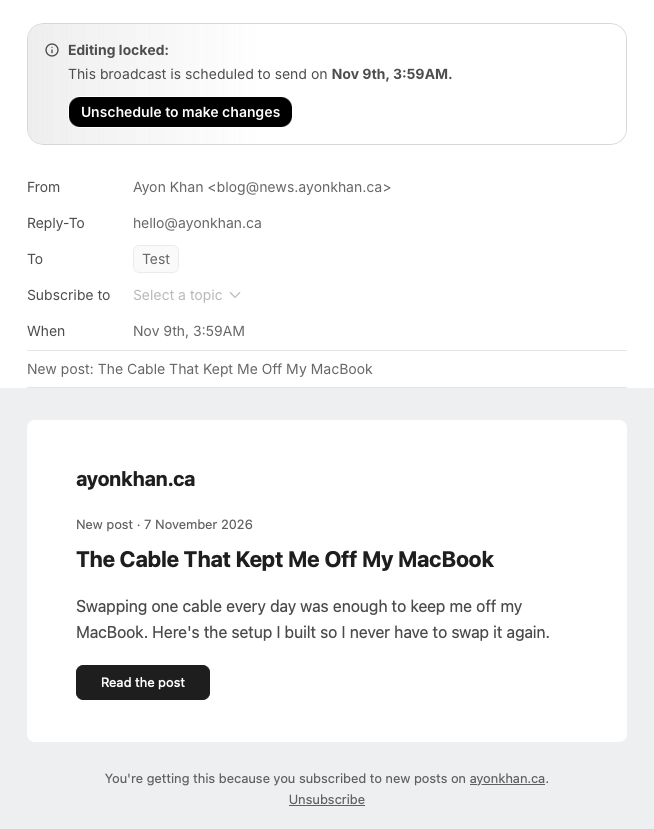
A new post email, waiting in Resend, with the Reply-To set
Testing Without Emailing Anyone
Both parts run on my Mac with Wrangler, Cloudflare’s command-line tool. The signup side uses Turnstile’s test keys, so I can sign up as often as I like.
For the Worker, I made a second segment in Resend called Test, with only my own address in it. When the Worker runs on my Mac, it uses that segment, so a local test can never email my subscribers.
Landing in the Inbox
Before telling anyone, I ran the confirmation email through mail-tester again. SPF and DKIM passed, but it couldn’t check DMARC. The subdomain was relying on the DMARC record of ayonkhan.ca, which mail servers like Gmail accept, but mail-tester can’t follow. The fix was to give news.ayonkhan.ca a DMARC record of its own, with the same rules. After that, the confirmation email scored 10 out of 10, and so did a new post email.
While I was at it, I also checked the original DMARC record on ayonkhan.ca with EasyDMARC, which called it invalid because it had three tags from a newer draft of the DMARC standard. Some tools don’t recognize them yet. All three were set to their default values anyway, so I removed them.
Resend also adds a plain text version of each email automatically, which spam filters like to see.
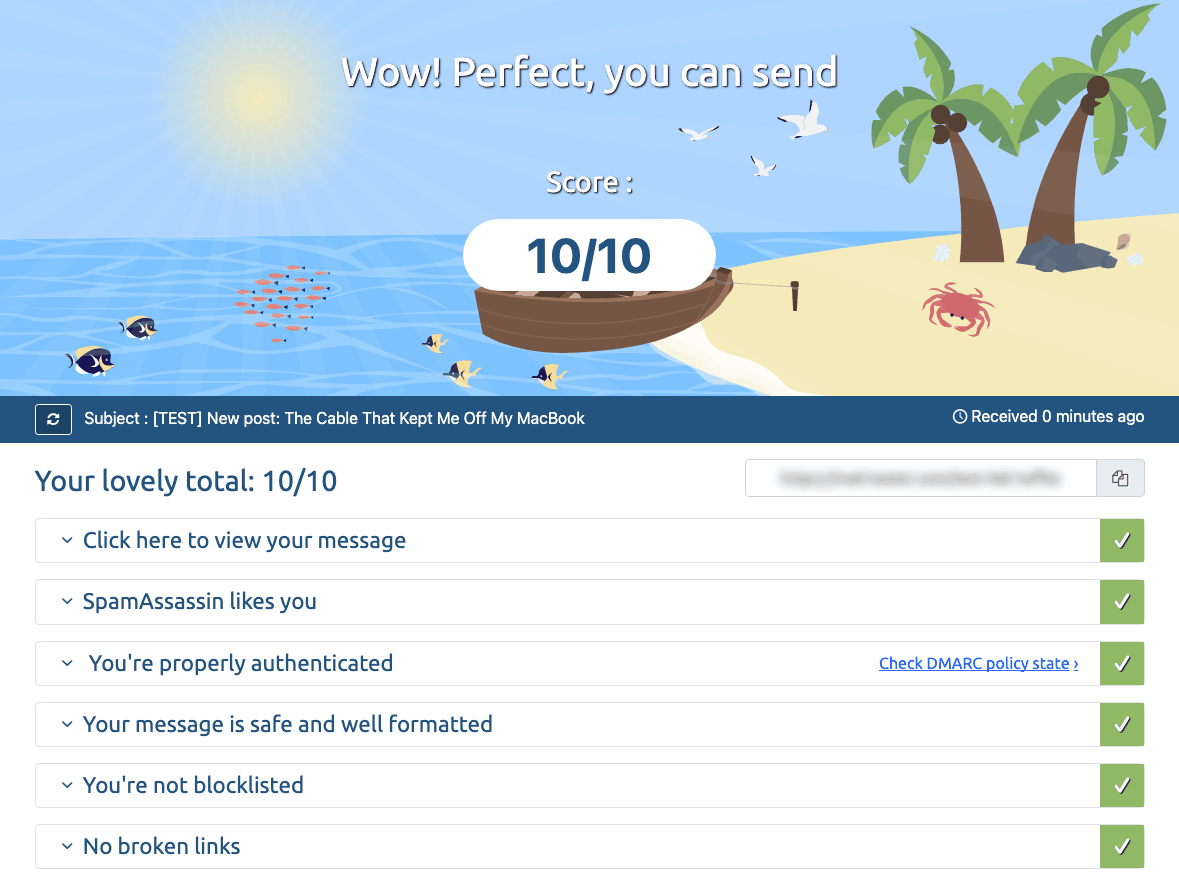
A new post email on mail-tester
Even so, when a friend tested it with an Outlook.com address, the email went to junk. Outlook.com is cautious with domains it hasn’t seen send email before, but it trusts them more as they build a history. If you subscribe with an Outlook.com, Hotmail or Live address, check your junk folder, mark the email as Not junk, and add [email protected] to your contacts.
What It Costs
Nothing. Everything fits in the free plans:
| Service | Free limit | My usage |
|---|---|---|
| Resend contacts | 1,000 contacts | Me, and hopefully you |
| Resend emails | 100 a day | 2 per signup |
| Cloudflare Pages Functions | 100,000 requests a day | 2 per signup, 1 per unsubscribe |
| Cloudflare Workers | 100,000 requests a day | 24 runs a day |
| Cloudflare KV | 1,000 writes a day | 1 per new post |
| Cloudflare Turnstile | Free | 1 widget |
The one limit worth watching is CPU time. On the free plan, each Worker run gets 10 ms, and Paperboy’s runs used between 2 and 7 ms. Part of that goes into parsing my RSS feed. By default, Hugo puts every post in the feed, and my blog has posts going back to 2008. Paperboy only needs the newest post, so I limited the RSS feed to the 20 most recent posts, which leaves room as the blog grows.
Making It Reusable
I built all of this for my own blog first. What’s now PaperMod Subscribe lived in my blog’s repo, and Paperboy already had a repo of its own. Once everything worked, I thought other PaperMod users might want the same thing without building it from scratch, so I made both parts public, under the MIT license:
- PaperMod Subscribe adds the form, the confirmation and unsubscribe pages, and the Functions to a Hugo site using PaperMod. You add it to your site as a submodule, the same way you added PaperMod.
- Paperboy works with any site that has an RSS feed, not only Hugo.
They stay separate because they’re installed in different ways. PaperMod Subscribe lives inside the Hugo site and runs with it on Cloudflare Pages. Paperboy is a standalone Worker that runs on a schedule. You can use either one on its own.
Making them reusable meant pulling everything specific to my blog out of the code. The site name, the date format, the time zone and the send delay are now settings, and my own values live in the Cloudflare dashboard instead of the repo. Each README walks through the setup, from the Resend account to the Cloudflare settings.
Back in Your Inbox
Now, when I publish a post, subscribers get an email about it within a few hours, and I don’t have to remember to do anything.
This post is the first one to go out. If you got here from that email, it worked.
If you’d like to get the next one, the form is right below.